Strawberry Tree Jam

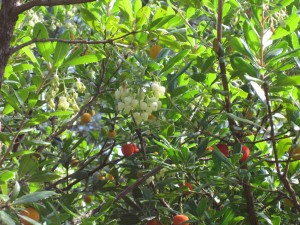
Since purchasing our place at Yarrawonga, we have been watching the slow progress of the fruits of this tree which we were at first unable to identify. It’s serrated leaves made us think of a banksia, but it had these hard yellow balls of fruit. It was only as the fruit began to ripen in Autumn that we identified it as a strawberry tree. There were so many fruits, that we had to find a way to use them. Its scientific name arbutus unedo is explained by Pliny the Elder to have been derived from unum edo meaning “I eat one.” According to many this is a bland mealy fruit, yet we found it to taste somewhere between a guava and a nectarine. It was quite delicious if a little flowery. We discovered that it is used to make the liqueur madrono and to make jam. We decided to attempt to make jam with it as we had so many fruits. Here is our jam recipe.
Strawberry Tree Jam
Ingredients:
- 4 cups of strawberry tree fruit, a mixture of both ripe and not quite ripe fruits
- Juice of one lemon
- 1 cup caster sugar
Recipe:
- As the fruit ripened over a period of weeks, we would freeze each batch as we harvested them, which also had the added advantage of breaking down the cell structure. We used a mixture of both frozen and freshly picked fruit.
- Wash fruit very well, leaving the skins on and make sure you get rid of all the stems, otherwise they will turn into hard black lumps which you spend a lot of time trying to remove when bottling.
- Bring fruit and lemon juice to the boil. Turn down and simmer for about an hour, stirring occasionally.
- Add sugar. We quite like slightly tart jams, so if you prefer a sweeter jam, feel free to add more sugar to taste.
- Simmer for three more hours, stirring regularly to break the fruit up and to ensure that the sugar is melted through.
- We found the easiest way to sterilise jars is to wash the jars and lids well in soapy water, rinse them well in hot water and place in a 120° oven to dry. Remove just before bottling.
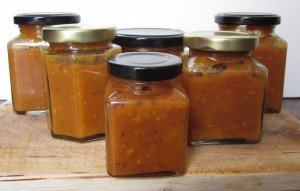
- When the jam looks like it has the right consistency, we like our jam thick and chunky so we left it as it was, but you can mash it if you want a smoother texture, take off the heat. It should be deep orange colour.
- Fill sterilised jars with jam, put on lid and turn over and place downwards on lid whilst jam is still hot. This will also sterilise the inside of the lids.
- Enjoy on toast or bread.

This is a scaled down version of our recipe, we used about seven cups of fruit to the juice of two lemons and 1 3/4 cups of sugar. As we have never made jam before, this was an experiment which worked. We were very pleased with the results, and really, just excited by the fact that we had made something from our garden. Before this adventure I was terrified of making jam, but it was really quite easy. I shall definitely be trying it again.

Please be very careful; follow up-to-date canning methods. Turning jars up-side-down is an old wives tale; it does not serve any purpose. Also, be sure to process all jams in a boiling water bath before shelf storage. The process listed above is only suitable for jam to be held in the fridge and quickly eaten.